

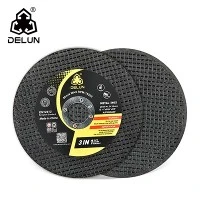


Chamfering is a common machining process used to create a beveled edge on a workpiece, which enhances the appearance, reduces sharp edges, improves safety, and facilitates the assembly of parts. Abrasive flap wheels are a versatile and efficient tool for chamfering a wide range of materials, including metal, wood, and plastic. As an Abrasive Flap Wheel supplier, I'm here to share with you how to use an abrasive flap wheel for chamfering effectively and safely.
Understanding Abrasive Flap Wheels
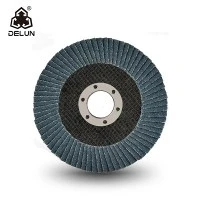
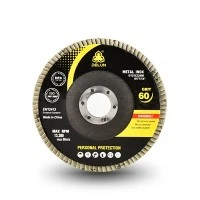
Before diving into the chamfering process, it's essential to understand what abrasive flap wheels are. Abrasive flap wheels Abrasive Flap Wheel consist of multiple overlapping abrasive flaps attached to a central hub. These flaps are typically made of abrasive grains bonded to a backing material, such as cloth, paper, or film. The design of the flap wheel allows for continuous self-sharpening as the flaps wear, ensuring consistent cutting performance throughout the tool's life.
There are various types of abrasive flap wheels available, each designed for specific applications and materials. Common abrasive grains used in flap wheels include aluminum oxide, silicon carbide, and zirconia alumina. Aluminum oxide is suitable for general-purpose grinding and chamfering of ferrous metals, while silicon carbide is ideal for non-ferrous metals, ceramics, and glass. Zirconia alumina offers high cutting rates and long life, making it suitable for heavy-duty applications.
Selecting the Right Abrasive Flap Wheel
Choosing the correct abrasive flap wheel is crucial for achieving optimal chamfering results. Here are some factors to consider when selecting a flap wheel:
Material Compatibility
Ensure that the abrasive grain of the flap wheel is compatible with the material you are chamfering. For example, use aluminum oxide flap wheels for steel and other ferrous metals, silicon carbide for non-ferrous metals like aluminum and brass, and ceramic or zirconia alumina for high-strength alloys and stainless steel.
Coarseness (Grit Size)
The grit size of the abrasive flap wheel determines the coarseness of the cut. A lower grit number indicates a coarser abrasion, which is suitable for removing large amounts of material quickly. A higher grit number provides a finer finish and is ideal for final shaping and polishing. For rough chamfering, start with a lower grit flap wheel (e.g., 36 - 60 grit) and then progress to a finer grit (e.g., 80 - 120 grit) for a smoother finish.
Wheel Size and Shape
Select a flap wheel size and shape that is appropriate for your chamfering application. The diameter of the wheel should match the size of the workpiece and the available power tool. Flap wheels come in various shapes, including flat, conical, and cylindrical, each designed for specific chamfering tasks. For example, a conical flap wheel is suitable for chamfering inside corners, while a flat flap wheel is ideal for flat surfaces.
Safety Precautions
Using an abrasive flap wheel for chamfering involves certain risks, so it's essential to take appropriate safety precautions to protect yourself and others. Here are some safety tips to follow:
Wear Personal Protective Equipment (PPE)
Always wear safety glasses or goggles to protect your eyes from flying debris. Additionally, wear a dust mask to prevent inhalation of abrasive dust, gloves to protect your hands, and hearing protection if the power tool is noisy.
Inspect the Flap Wheel
Before using the abrasive flap wheel, inspect it for any signs of damage, such as cracks, loose flaps, or uneven wear. Do not use a damaged flap wheel, as it can pose a safety hazard.
Secure the Workpiece
Ensure that the workpiece is securely clamped or fixed in place to prevent it from moving during the chamfering process. This will help you maintain control and accuracy and reduce the risk of accidents.
Follow the Manufacturer's Instructions
Read and follow the manufacturer's instructions for the abrasive flap wheel and the power tool. This includes proper installation, speed settings, and operating procedures.
Using an Abrasive Flap Wheel for Chamfering
Now that you have selected the right abrasive flap wheel and taken the necessary safety precautions, it's time to start chamfering. Here is a step-by-step guide on how to use an abrasive flap wheel for chamfering:
Step 1: Mount the Flap Wheel
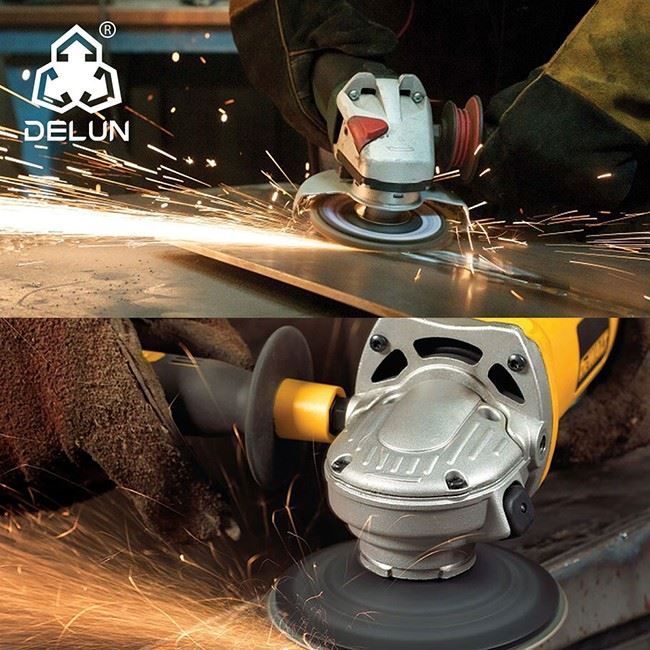
Install the abrasive flap wheel on the appropriate power tool, such as a grinder or a right-angle die grinder. Make sure the wheel is securely fastened and aligned with the tool's spindle. Refer to the power tool's user manual for specific instructions on mounting the flap wheel.
Step 2: Set the Power Tool Speed
Adjust the speed of the power tool according to the manufacturer's recommendations for the abrasive flap wheel and the material you are chamfering. Running the tool at the correct speed is essential for achieving optimal cutting performance and preventing damage to the flap wheel and the workpiece.
Step 3: Position the Workpiece
Place the workpiece in a suitable position for chamfering. Ensure that the edge you want to chamfer is accessible and that the workpiece is stable. If necessary, use a vise or clamps to secure the workpiece.
Step 4: Start Chamfering
With the power tool turned on, gently bring the abrasive flap wheel into contact with the edge of the workpiece at a slight angle. Apply light pressure and move the flap wheel along the edge in a smooth, continuous motion. Avoid applying too much pressure, as this can cause the flap wheel to overheat and wear out quickly.
Step 5: Control the Chamfer Angle and Depth
To control the chamfer angle, maintain a consistent angle between the flap wheel and the workpiece edge. You can use a protractor or an angle guide to ensure the desired chamfer angle is achieved. To control the chamfer depth, gradually increase the pressure on the flap wheel as you move along the edge. Make multiple passes if necessary to achieve the desired depth.
Step 6: Check the Chamfer
Periodically stop the chamfering process to check the progress and the quality of the chamfer. Use a measuring tool, such as a caliper or an angle gauge, to verify the chamfer angle and depth. If necessary, make adjustments to the chamfering technique or the power tool settings.
Step 7: Finish the Chamfer
Once you have achieved the desired chamfer angle and depth, continue moving the flap wheel along the edge to smooth out any rough spots or irregularities. You can also use a finer grit flap wheel Flap Disc 4.5 Inch Alumina Zirconia or a polishing flap disc 4.5'' Abrasive Polishing Flap Disc For Stainless Steel to give the chamfer a smooth, refined finish.
Troubleshooting Common Issues
While using an abrasive flap wheel for chamfering, you may encounter some common issues. Here are some troubleshooting tips to help you resolve these issues:
Excessive Wear of the Flap Wheel
If the flap wheel is wearing out too quickly, it may be due to using the wrong grit size, applying too much pressure, or running the power tool at an incorrect speed. Adjust the grit size, reduce the pressure, and ensure the power tool is running at the recommended speed.
Poor Cutting Performance
If the flap wheel is not cutting effectively, it may be due to a dull abrasive, a clogged wheel, or an incorrect angle of attack. Replace the flap wheel if it is dull, clean the wheel to remove any debris, and adjust the angle of attack to ensure proper contact with the workpiece.
Rough or Uneven Chamfer
If the chamfer is rough or uneven, it may be due to inconsistent pressure, a worn flap wheel, or an incorrect chamfering technique. Apply consistent pressure, replace the flap wheel if it is worn, and practice a smooth, continuous chamfering motion.
Maintenance and Storage of Abrasive Flap Wheels
Proper maintenance and storage of abrasive flap wheels can extend their lifespan and ensure consistent performance. Here are some tips for maintaining and storing flap wheels:
Clean the Flap Wheel
After each use, clean the flap wheel to remove any debris or dust. You can use a brush or compressed air to clean the wheel. Avoid using solvents or chemicals, as they can damage the abrasive grains and the backing material.
Store the Flap Wheel Properly
Store the abrasive flap wheels in a dry, cool place away from direct sunlight and moisture. Keep the wheels in their original packaging or in a protective container to prevent damage. Avoid stacking heavy objects on top of the flap wheels, as this can cause the flaps to deform.
Contact Us for Your Abrasive Flap Wheel Needs
If you are looking for high-quality abrasive flap wheels for chamfering or other applications, we are here to help. As a leading Abrasive Flap Wheel supplier, we offer a wide range of flap wheels in different sizes, grits, and abrasive grains to meet your specific needs. Our products are manufactured to the highest standards using the latest technology and materials, ensuring excellent cutting performance, long life, and reliability.
Whether you need Flap Sanding Disc For Grinder, Surface Conditioning Flap Disc 6inch, or any other type of abrasive flap wheel, we have the solution for you. Contact us today to discuss your requirements and get a free quote. We look forward to assisting you with your abrasives needs.
References
- Abrasive Engineering Handbook.
- Industrial Abrasive Products Manufacturers' Guides.
- Power Tool Operation Manuals.