Grinding discs, also known as abrasive discs or cutting-off wheels when designed for that purpose, are essential tools in metalworking, fabrication, construction, and many DIY applications. However, they are inherently dangerous if used incorrectly. Understanding and strictly adhering to proper usage procedures is paramount for safety and achieving optimal results. This guide covers the essential steps and principles.
1. Pre-Use Preparation: Safety & Selection
Personal Protective Equipment (PPE): NON-NEGOTIABLE
Eye Protection: ANSI Z87.1+ rated safety glasses are mandatory. A full-face shield worn over safety glasses provides the highest level of protection against flying sparks, debris, and potential disc fragments.
Hearing Protection: Grinders generate significant noise. Use earplugs or earmuffs rated appropriately.
Respiratory Protection: Grinding creates hazardous dust (metal, concrete, silica). Use a properly fitted NIOSH-approved respirator (N95/P2 minimum; often P100 for metals/silica) or a powered air-purifying respirator (PAPR) for extended use.
Hand Protection: Heavy-duty, well-fitting leather gloves protect hands from sparks, sharp edges, heat, and vibration. Avoid loose gloves that could snag.
Body Protection: Wear long sleeves made of durable, non-synthetic fabric (like cotton or leather), pants without cuffs, and steel-toed safety boots. A leather apron offers additional protection.
Selecting the Correct Disc:
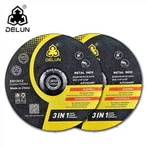
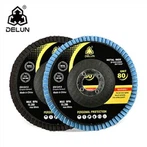
Material: Match the disc type to the material being worked on (e.g., aluminum oxide for steel/stainless, silicon carbide for concrete/tile/stone, zirconia alumina for heavy grinding on steel). Using the wrong abrasive can lead to inefficiency, rapid wear, or dangerous disc failure.
Disc Type: Use grinding discs for surface grinding, material removal, and deburring. Do not use a grinding disc for cutting; use a dedicated cutting-off wheel. Cutting discs are thinner and designed for plunge cuts.
Size and Arbor Hole: Must perfectly match the specifications of your angle grinder (e.g., 115mm, 125mm, 230mm disc diameter; 22.23mm arbor hole). Never force a disc onto a mismatched arbor.
RPM Rating: The disc's maximum operating RPM (Revolutions Per Minute) must exceed the grinder's no-load RPM (clearly marked on the grinder and the disc). Using an under-rated disc is extremely dangerous and can cause catastrophic disintegration.
Condition Inspection: Before installing, every time: Visually inspect the disc for cracks, chips, warping, or damage. Tap it lightly with a non-metallic object (like a plastic handle); a clear "ring" usually indicates integrity, a dull "thud" suggests internal damage – DO NOT USE. Check the expiry date on the packaging (yes, discs degrade over time).
Work Area Preparation:
Ensure the area is clean, well-lit, and free of tripping hazards.
Remove flammable materials, liquids, and vapors. Have a fire extinguisher nearby.
Secure the workpiece firmly using clamps or a vise. Never hold workpieces by hand while grinding.
Position yourself for stability, with a clear path to retreat if needed. Maintain good balance.
2. Installation & Machine Setup
Unplug the Grinder: Always disconnect from the power source before handling the disc.
Inspect the Grinder: Check the guard is intact, secure, and positioned correctly. Ensure the spindle lock is functional but never engage it while the disc is spinning. Check the power cord for damage.
Fit the Disc Correctly:
Use clean, undamaged flanges (clamping washers) of the correct size specified by both the grinder and disc manufacturer. Flanges distribute clamping force evenly.
Ensure the disc sits flat and centered between the flanges.
Tighten the retaining nut securely using the correct wrench/spanner. Hand-tighten firmly, then give it a final snug turn with the wrench – do not overtighten.
Position the Guard: Adjust the guard so it provides maximum protection between you and the disc/sparks. It should cover the top half of the disc (typically 10 o'clock to 2 o'clock position relative to the user). NEVER operate a grinder without the guard.
Check Rotation: Before starting on the workpiece, briefly start the grinder and ensure the disc rotates in the correct direction (indicated by arrows on the disc and grinder). The rotation direction should pull sparks away from you (usually downward at the front).
3. Operation: Technique is Critical
Start-Up: Hold the grindeer firmly with both hands. Stand clear of the disc path. Start the tool away from the workpiece and allow it to reach full operating speed before making contact. Let it run freely for a few seconds after stopping before setting it down.
Correct Angle: For surface grinding, hold the grinder so the disc contacts the workpiece at a slight angle (5° to 15°). Grinding flat with the disc's full face creates excessive friction, heat, and binding risk.
Pressure & Movement: Apply moderate, consistent pressure. Let the abrasive do the work – forcing it overheats the disc and workpiece, causes rapid wear, and increases the risk of kickback or disc failure. Move the grinder steadily back and forth across the work area.
Grinding Path: Use the lower front quadrant of the disc (between 4 o'clock and 7 o'clock positions relative to the disc face). This maximizes control and utilizes the strongest part of the disc. Never grind with the disc edge perpendicular to the workpiece.
Disc Edge Contact: Absolutely never force the grinding disc sideways or apply side pressure. Grinding discs are designed for contact with their periphery and face, not their thin edge. Contact with the thin edge can instantly jam or shatter the disc.
Kickback Awareness: Kickback occurs when the disc binds or grabs, violently throwing the grinder back towards the operator. Causes include using the wrong disc, incorrect angle, excessive pressure, snagging on an edge, or edge contact. Always maintain a firm grip, stable stance, and be prepared for sudden movement. Keep bystanders clear.
Heat Management: Avoid prolonged grinding in one spot to prevent overheating the disc (can weaken it) or the workpiece (can cause warping or discoloration). Use a grinding fluid if appropriate and specified for the disc/workpiece combination (check disc suitability first).
Regular Breaks: Allow the tool and disc to cool periodically, especially during heavy use.
4. Post-Use & Maintenance
Shutdown: Lift the disc completely clear of the workpiece before releasing the trigger. Allow the disc to stop spinning completely before setting the grinder down.
Disc Inspection: After stopping, inspect the disc again for damage. Replace it if worn down near the arbor hole (usually indicated by a wear limit line) or shows any signs of damage.
Tool Storage: Store the grinder unplugged in a dry place. Store discs flat in a cool, dry environment away from moisture and direct sunlight, preferably in their original packaging or a dedicated rack. Never expose discs to impacts or bending forces.
Golden Rules of Grinding Disc Safety:
PPE Always: Never skip eye, ear, respiratory, hand, and body protection.
Guard Always: Never remove or improperly position the guard.
Correct Disc Always: Match material, type, size, arbor, and RPM rating.
Inspect Always: Thoroughly inspect disc before every use.
Secure Workpiece: Never hold work by hand.
Avoid Edge Contact: Never use the thin edge of a grinding disc.
Respect Rotation & Path: Use the correct disc rotation and grinding quadrant.
Don't Force It: Let the abrasive work; excessive pressure is dangerous.
Beware of Kickback: Maintain control and be prepared.
Follow Manufacturer Instructions: Always adhere to both grinder and disc manufacturer specifications.
By meticulously following these guidelines, you significantly reduce the risks associated with using grinding discs and ensure efficient, effective, and safe operation. Remember, complacency is a major cause of accidents. Treat the grinder and disc with the respect these powerful tools demand.